OPenAi & ChatGPT Integration
Open AI is an AI tool just like Dialogflow which enables the users to interact using AI. From replying to users to generating images, you can use OpenAI for a variety of tasks.
Integrating OpenAI's ChatGPT with botbuz can provides numerous benefits to businesses looking to engage with their customers across various channels.
With all the channels botbuz support, such as Messenger, Instagram, WhatsApp, Google Business Messenger, Voice, SMS, Viber, Line, VK, web chat, WeChat, and more, connecting with ChatGPT, You can offer businesses AI-powered conversational capabilities that can understand and respond to customer queries in a human-like manner, improving the customer experience and increasing engagement.
ChatGPT's advanced natural language understanding and generation capabilities enable our chatbot to understand the context of the conversation and offer personalised responses that are relevant to customer queries.
Combined with our multichannel capabilities, businesses can engage with their customers across their preferred communication channels, enhancing their overall experience. The result is improved customer satisfaction, increased engagement, and streamlined customer support, all of which can help businesses grow and succeed.
botbuz offers native integration with OpenAI, which enables users to set up the complex flow with just a click of a button.
Let us first see how we can establish a connection between OpenAI and botbuz.
- Bridging Connection with OpenAI Account
- OpenAI Native Actions Create Text Completion
- Create Text Completion
- Input:
- Response:
- Map the response to custom field
- Sample Response Data
- Best Practices:
- Image Generation
- Input:
- Response:
- Sample Response Data
- Best Practices:
- Translate Audio to English
- Input:
- Response:
- Sample Response Data
- Best Practices:
- Create Chat Completion - ChatGPT
- Input:
- Response:
- Sample Response Data
- Best Practices:
- User cases: ChatGPT
- How to fine tune ChatGPT for your business
- Generate the chatbot flow using A.I
- Power up your live chat with the AI assistant
- OpenAI Training Reply to Facebook and Instagram post comments
- Clear Remembered Chat History
- OpenAI Embeddings & Building your Knowledge Base
- Create An Embedding:
- Importing Embeddings:
- Embedding Match & Completion Actions
- Input:
- Response:
- Input:
- Response:
- Sample Response Data
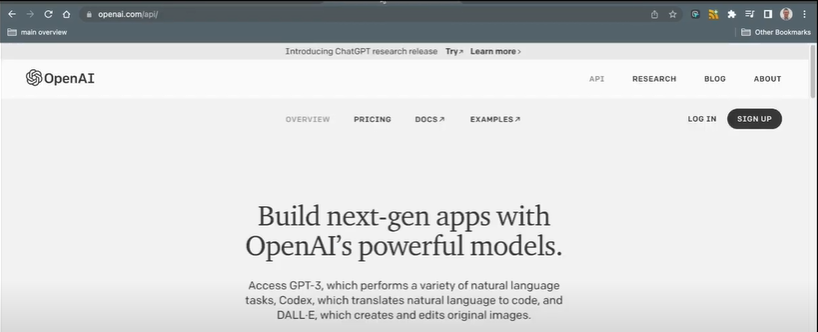
Bridging Connection with OpenAI Account
1.Visit OpenAI
2.Login using your credentials.
3.Click on top-right corner on the “Personal” tab.
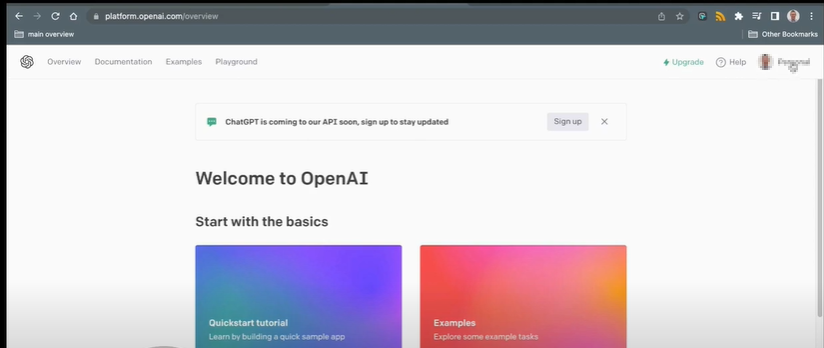
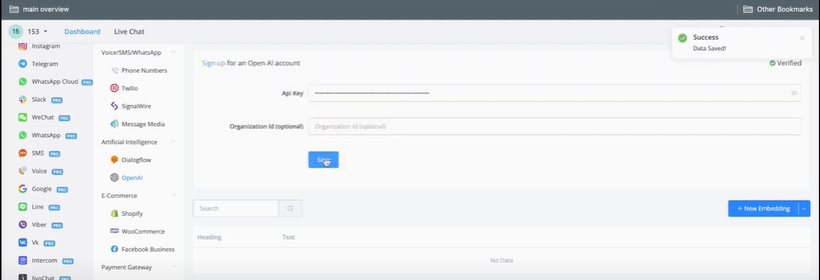
4.From here, you will be able to generate an api key.
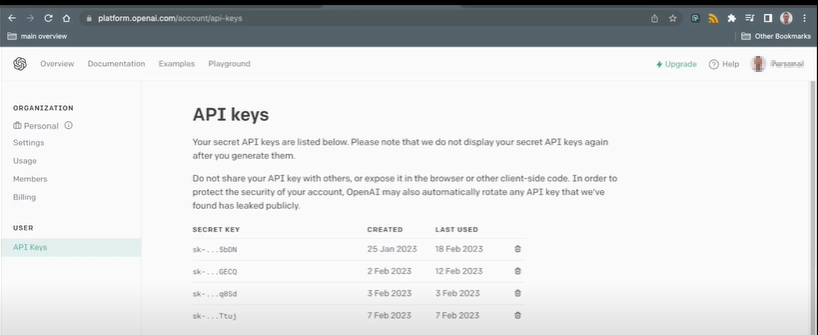
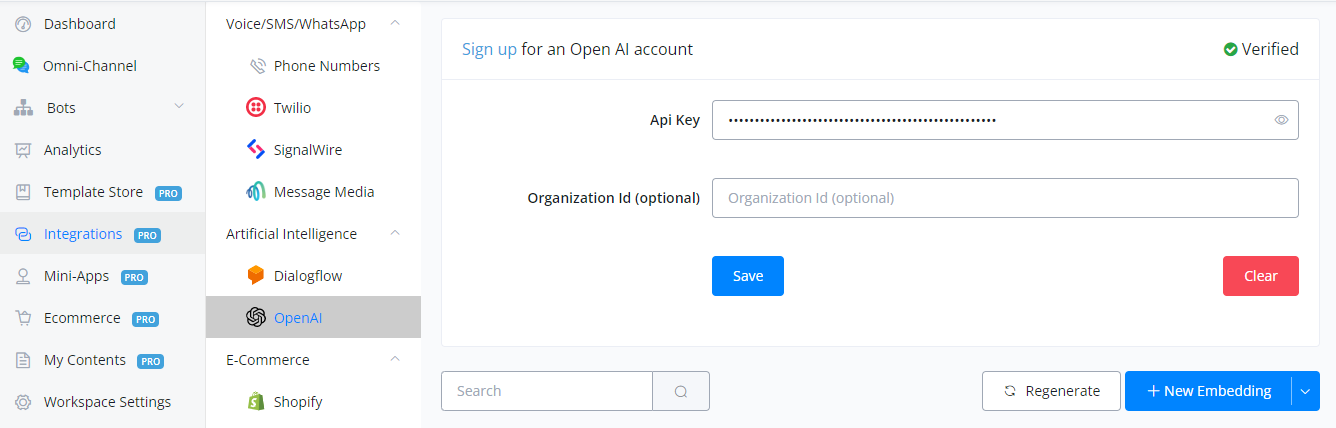
Paste your API key inside Botbuz and click “Save” to establish the connection.
OpenAI Native Actions
Botbuz gives a lot of actions with OpenAI which users can use for their needs.
We will now discuss them in detail one by one.
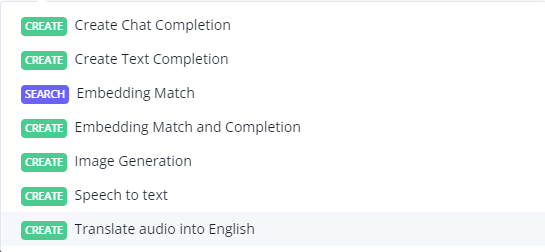
Create Text Completion
Text completion offers the functionality of sending prompts to OpenAI in textual form and based on the prompt receiving an answer.
Input:
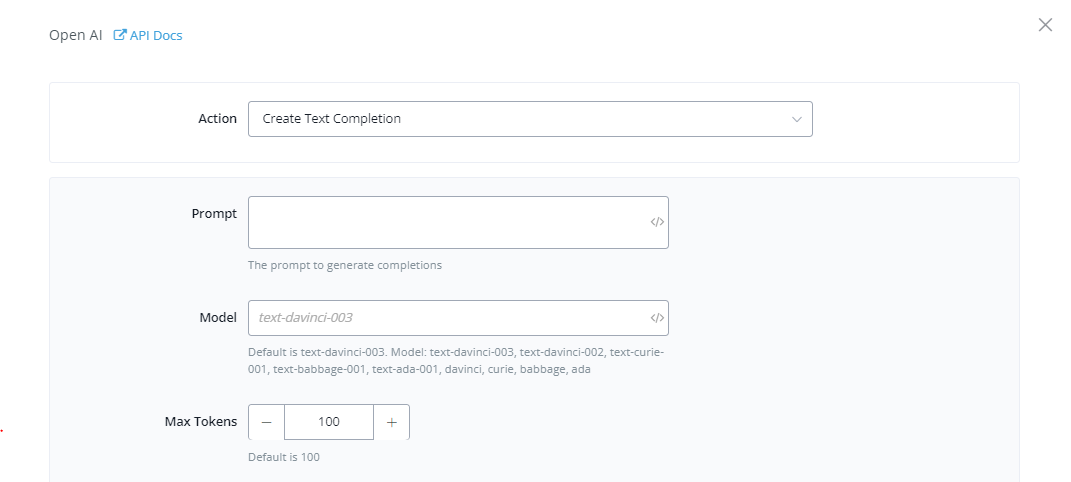
Prompt: This is your main input for which you want the AI to give you an answer or output of. This can be a question, an instruction, etc.
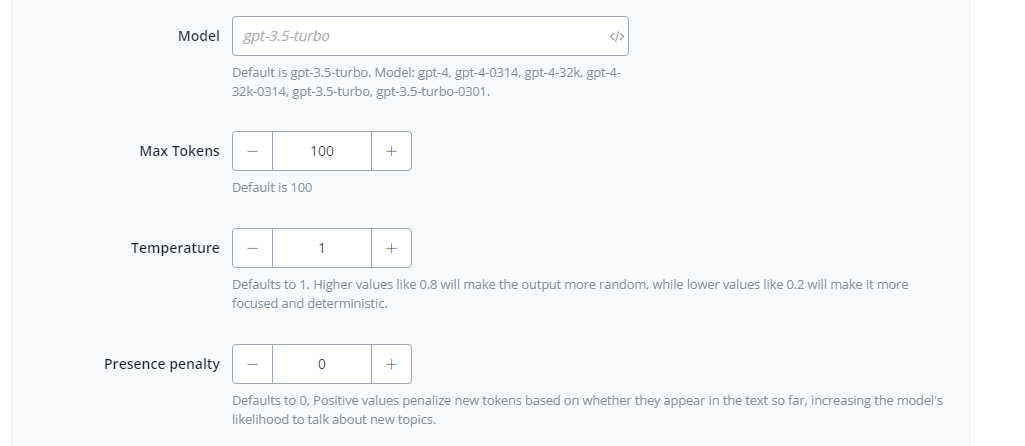
Model: The model you want to use inside OpenAI for the task. By default, text-DaVinci-003 has been selected.
Max Tokens: Each task inside OpenAI consumes tokens. These tokens can be replenished using credit. This field puts a limit on the maximum number of tokens you want to use for a particular task.
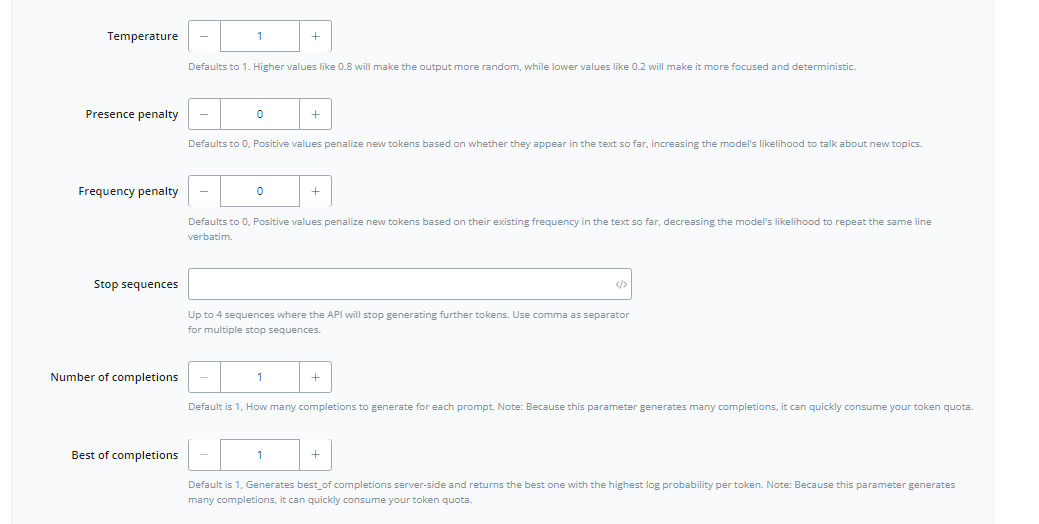
Temperature: This acts as an accuracy gauge where higher values give more random answers and lower values give more deterministic and focused answers. It defaults to 1
Presence Penalty: This value makes OpenAI use unique phrases and texts when completing a task. The higher the value, less repetitive the words. It defaults to 0.
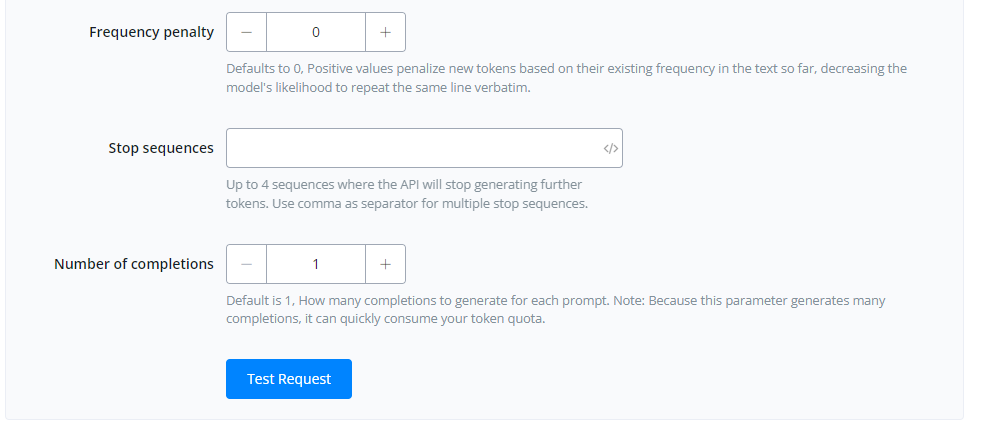
Number of Completions: The number of times you want the AI to generate a response based on your prompt. The higher value will result in more responses. It defaults to 1 in order to avoid the consumption of tokens.
Best of Completions: This returns the best possible response(s) for your prompt. It defaults to 1. This works with the Number of Completion field to choose the best possible answer from a group of responses.
Response:
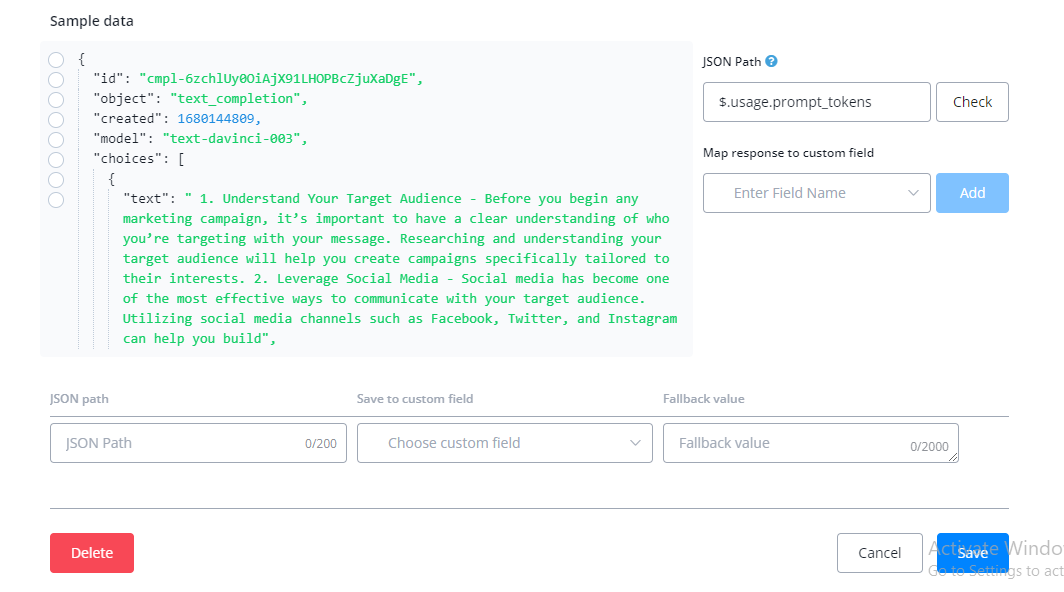
Map the response to custom field
You can select the text under the choices, and then you can see the JSON Path selected, and then you can save the response into your own user custom field, and then use this response in your flow builder.
Sample Response Data
Id : The id of the text completion. A unique value.
Object : The action/task you gave to OpenAI. In our case “text_completion”
Created : A date-time field that tells the instance of the creation of the response. It is in Unix timestamp format.
Finish reason : The reason for the stoppage of the said task.
Prompt tokens : The number of tokens used to complete the task.
Best Practices:
Sometimes the completed response you get back seems to be cut off. This is due to the lack of the number of tokens required for the completion of the task. Simply adjusting the value of Max tokens inside the input fields will fix this issue.
It is also advised to adjust values like temperature, the number of completions, best of completions, etc to your use case by means of split testing. Every use case is unique and you should want the best possible utilisation of the resources available.
Image Generation
Image Generation is used to generate images based on the user-input prompts. This feature will generate the best possible image that matches your given prompt.
Input:
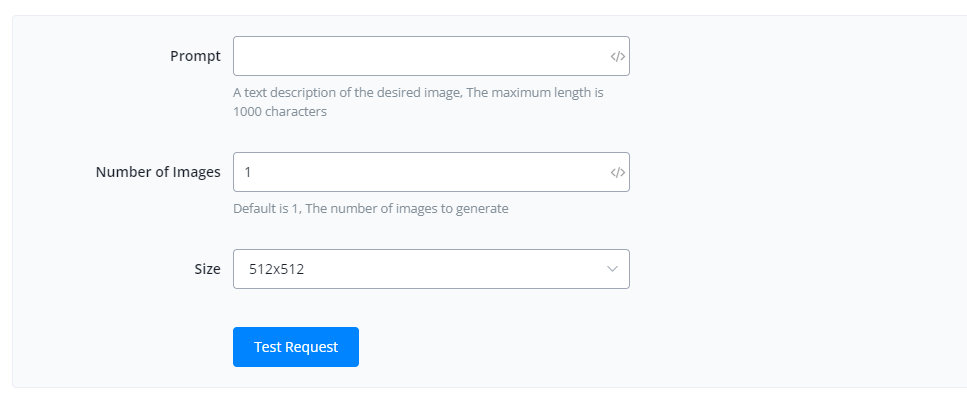
Prompt : This is your main input for which you want the AI to generate an image for you. This can be a question, an instruction etc.
Number of Images : The number of images you want the AI to generate for you. It is default to 1
Size : The dimensions you want the image to be. OpenAI support three sizes which are:
- 512×512
- 256×256
- 1024×1024
Response:
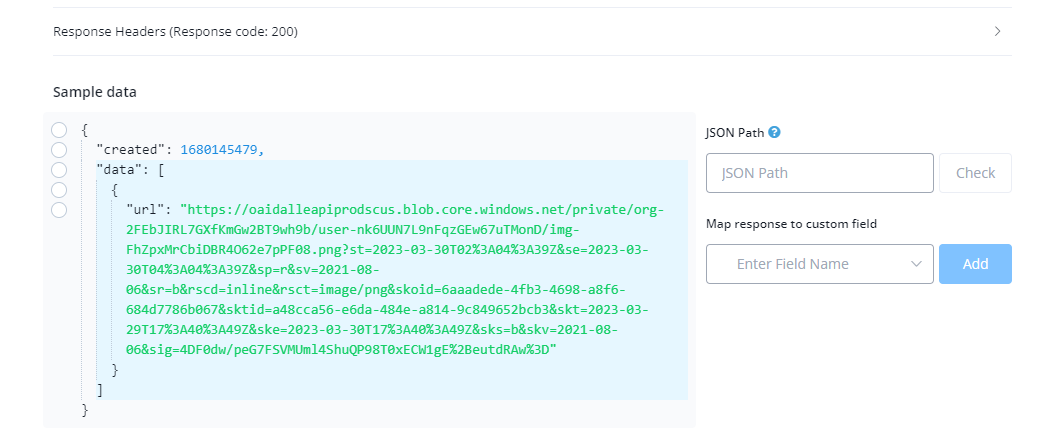
Sample Response Data
Created : A date-time field which tells the instance of creation of the response. It is in Unix timestamp format.
Url : The public URL for your image(s).
Best Practices:
Generating Images consume more computational power and hence the replies can be a delayed based on the prompts you give.
AI is a developing field and hence the images produced can be quite inaccurate given the complexity of the prompts provided. Hence finding the correct prompt complexity can sometimes be a challenge.
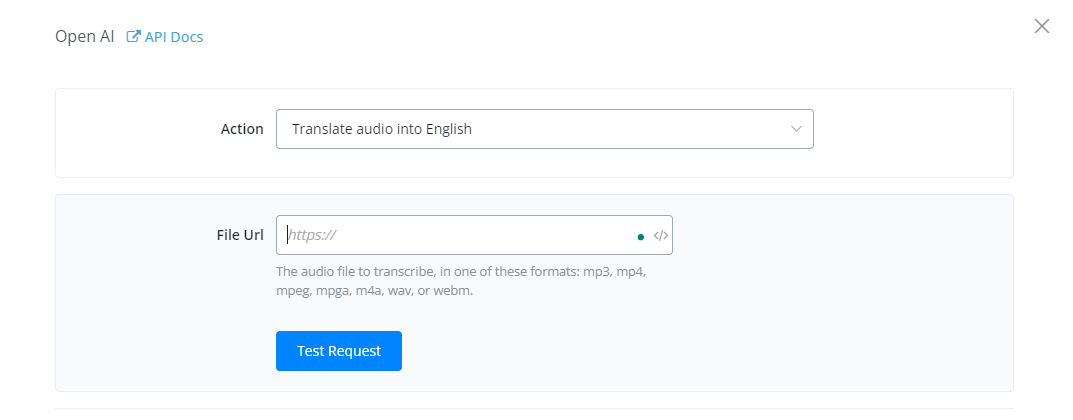
Speech to Text
Speech-to-text action is used when you want to convert audio input into text. This has variety of use cases such as implementation in IVRs.
Input:

File Url : This is the URL for the audio that you want to convert to text. Make sure that the url is a public hosted url ending with audio formats such as mp3. mpeg etc
Response
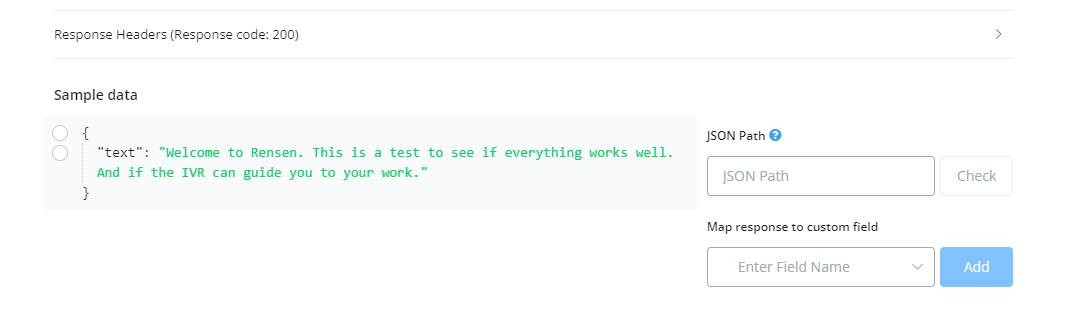
Sample Response Data
Text : The text which is converted from the speech.
Best Practices:
You can convert speech to text quite accurately using this feature. It is considered a best practice to provide the audio in the same language as that of the desired output for more accurate results and latency.
Input:
File Url : This is the URL for the audio that you want to convert to text. Make sure that the url is a public hosted url ending with audio formats such as mp3. mpeg etc
Response:

Sample Response Data
Text: The text which is converted from the speech.
Best Practices:
Experimenting with different formats of audio can provide more (or less) accurate results. This is simply due to the quality of the audio provided so make sure you split test with different formats to achieve the best possible format for your use case.
Create Chat Completion - ChatGPT
Chat completion offers a functionality of sending prompts to OpenAI in textual form and based on the prompt receive an answer. This is similar to text completion action but it uses ChatGPT which is 10x faster and cheaper as well.
Input:

System Message : This is an optional field and is used to provide additional context about you or your business when completing chats.
You can set up a detailed background information like this if you are building restaurant chatbot:
System: You are a botbuz steak restaurant helpful assistant. You will handle customer support, and guide the user and book reservations. The restaurant opening hours is 9am to 8pm Monday to Saturday, No pet is allowed. Always offer the coupon code if you see it’s good timing to do so.
This will allow you to easily set up background information about the chatbot, and it can serve your client based on the information you instructed.
Message : This is your main input for which you want the AI to give you an answer or output of. Usually this is the user’s response. This can be a question, an instruction etc. You can add “user:” as a prefix to your prompt in order to provide more context to the AI for eg:
“user : will it rain today?”
It will also work if you don’t add “user” in front of the response. You can use our system field like {{last_text_input}}

Remember History: If selected “Yes”, the chat history between user and assistant will be saved in a system field to be used for later if needed.
The openAI action response will be automatically saved into assistant role. You don’t need to do anything.
Also, we have introduced a new system JSON field: {{openAI}} which will have all the chat history with the user:

You can find the openAI system field from your user profile. This JSON will save the system set up, and all the chat history.
Model : The model you want to use inside ChatGPT for the task. By default gpt-3.5-turbo has been selected.
Max Tokens : Each task inside ChatGPT consumes tokens. These token can be replenished using the credit. This field puts a limit on the maximum number of tokens you want to use for a particular task.
Temperature : This acts as a accuracy gauge where higher values give more random answers and lower values give more deterministic and focused answers. It is default to 1
Presence Penalty : This value makes ChatGPT use unique phrases and texts when completing a task. The higher the value, less repetitive words. It is default to 0.
Number of Completions : The number of times you want the AI to generate a response based on your prompt. The higher value will results in more responses. It is default to 1 in order to avoid consumption of tokens.
Best of Completions : This returns the best possible response(s) for your prompt. It is default to 1. This works with Number of Completion field to choose the best possible answer from a group of responses.
Response:

Sample Response Data
Id : The id of the text completion. A unique value.
Object : The action/task you gave to OpenAI. In our case “text_completion”
Created : A date-time field which tells the instance of creation of the response. It is in Unix timestamp format.
Choice → Content : The content field inside the choice object contains the answer to your prompt.
Message: This is a JSON for complete conversation that has happened between the user and the assistant.
Best Practices:
Chat completion action enables you to provide JSON input as well hence you can save the complete conversation between the users and the assistant in a JSON to give more focused and contextual replies related to that conversation.
User cases: ChatGPT
How to fine tune ChatGPT for your business
If you use openAI embedding along with ChatGPT, you can train the chatGPT to answer your business related questions with complete ease!
Generate the chatbot flow using A.I
Have you ever imagined that with a simple instruction like “create a flow to order pizza” and then Botbuz can generate the whole flow automatically for you.
Everything is done with ChatGPT & botbuz.
Power up your live chat with the AI assistant
Have you ever think that you can use smart A.I assistant to using openAI embedding to generate the suggestion replies automatically?
This will increase your customer support efficiency and lower your customer support cost.
OpenAI Training Reply to Facebook and Instagram post comments
Have you ever think to use openAI to reply to your Facebook, Instagram post comments automatically, and most importantly the reply will be highly relevant and accurate to your own business.
The reason is that we are using openAI embedding to get the highly relevant answers from your own business database, and this can be done automatically.
Clear Remembered Chat History

Clear remembered history is used to delete or clear the system field where the chat history for chatGPT is stored.
This action will help you to reset the chat history.
OpenAI Embeddings & Building your Knowledge Base
OpenAI gives you the ability to provide a knowledge base of your use case or business for the AI to generate responses from. This enables the AI to give more accurate, contextual as well as particular answers instead of filtering them from the internet.
Create An Embedding:
To create an embedding, go into the Integrations and select OpenAI

Click on “New Embedding”
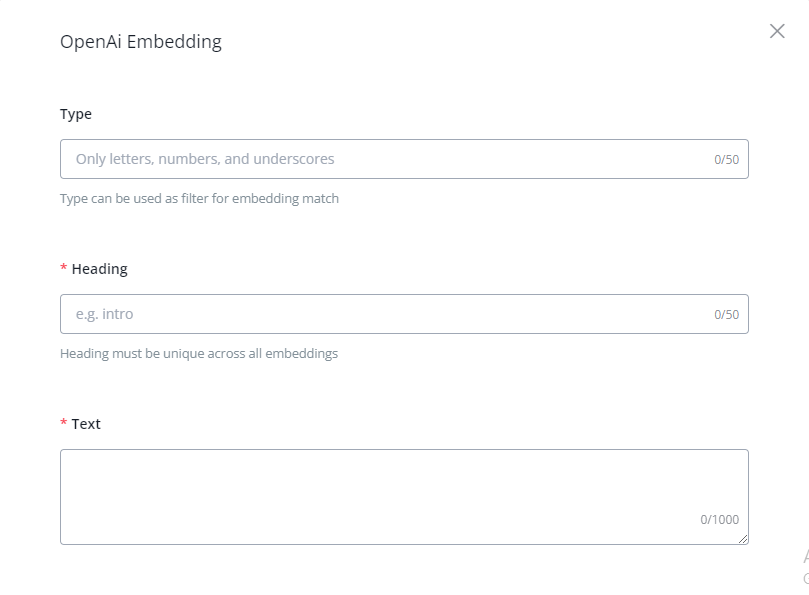
Type : This is an optional field. This is used to classify embeddings based on a certain context. Is used as a filter when there are a large number of embeddings associated. Always better to provide this field as it gives more context and becomes easier for AI to filter through.
Heading: The topic of the embedding that you have created. The title or summary.
Text : This is the text or main body of the embedding. The max character limit is 1000. You can put the details of the topic here for the AI to generate the response from.
Importing Embeddings:
Instead of manually creating embeddings you can create them in bulk by importing them as a CSV file.
Click on the drop-down arrow beside “New Embedding” and click on “Import CSV”
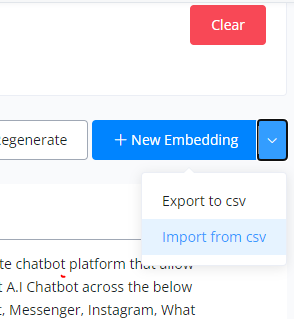
Now import the CSV file containing the embeddings and your embeddings will be created. If you have special characters like : è à ì ù, please select to “Import from csv without preview”

Embedding Match & Completion Actions
Input:
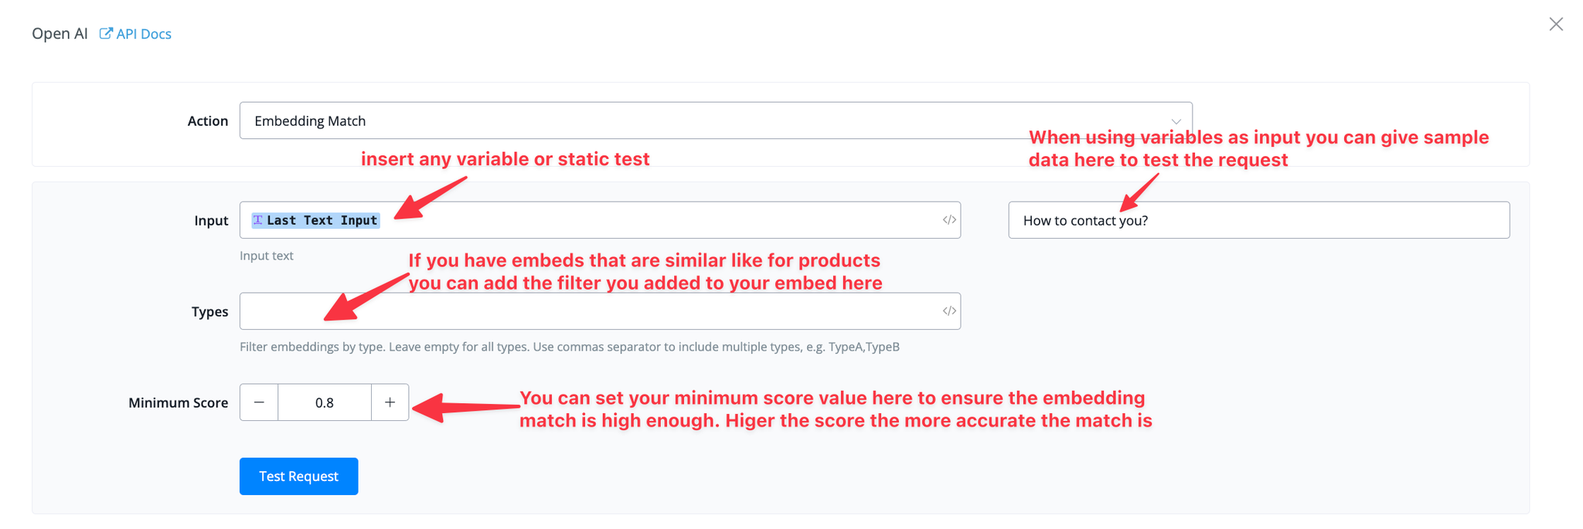
Input : This is where you will input or map the prompt you want to match the embedding to.
Response:
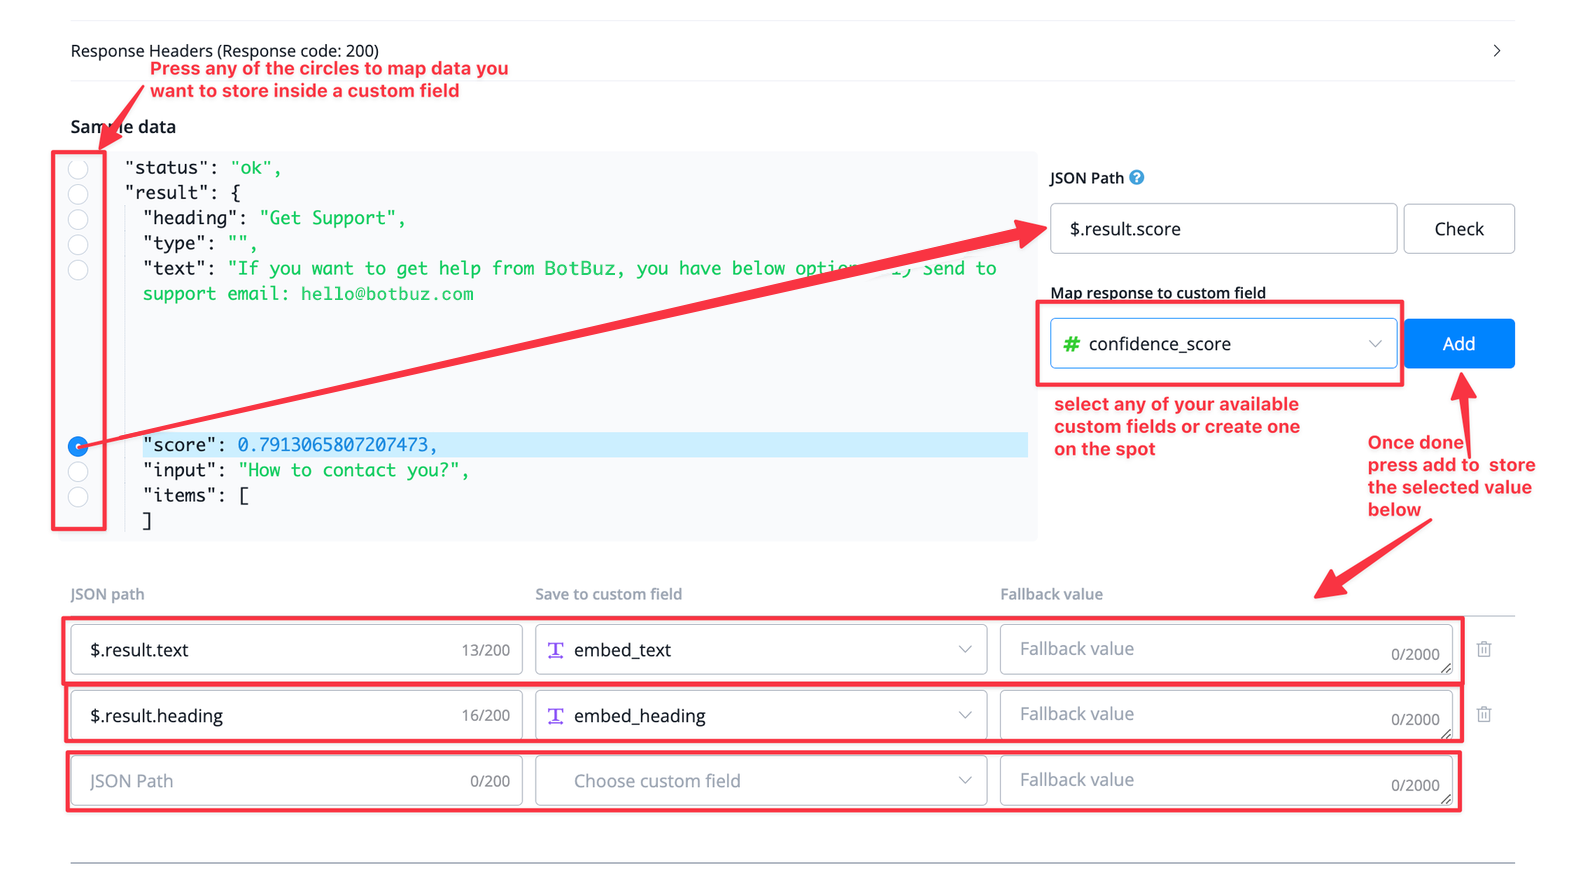
Embedding : The heading of the embedding the prompt is best matched to.
Text : The text of the embedding the prompt is best matched to.
Input : The prompt that you input for embedding search.
Score : This is the % of the match between prompt and the embeddings available. You can use this score determine whether the following prompt should be used for completion or is not sufficient and will give inaccurate answers.
It is observed that a score of 0.79 and above gives the best possible embedding match. However this is an empirical value and you used split test for your use case in order to obtain best possible answers.
The embedding match and completion action is used to match the entered prompt with best matching embedding from the knowledge base and then generate the response using that particular knowledge base.
Input:
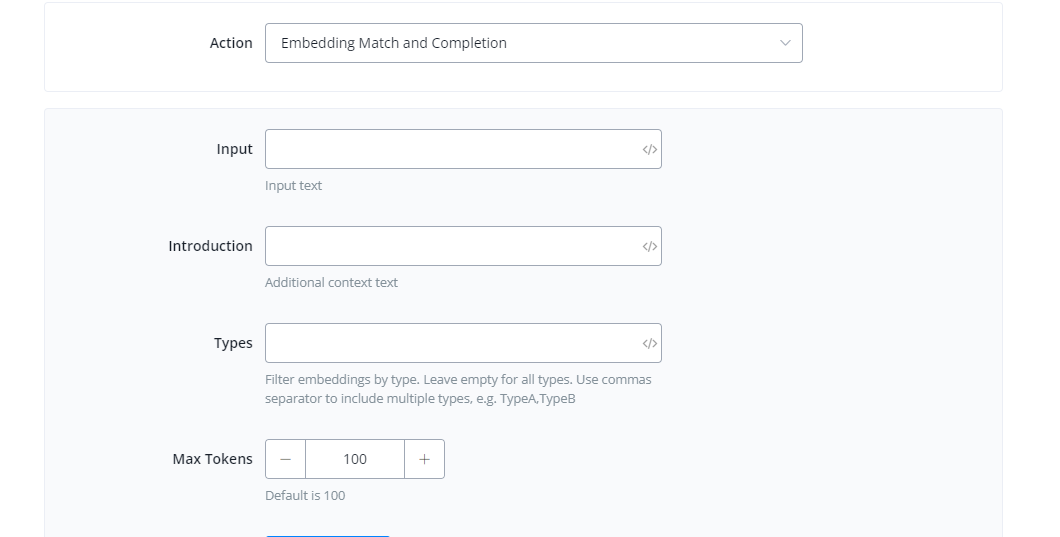
Input : This is where you will input or map the prompt you want to match the embedding to.
Introduction : This is used to provide more context to the prompt making the prompt more accurate and helps in raising the embedding match score.
Response:
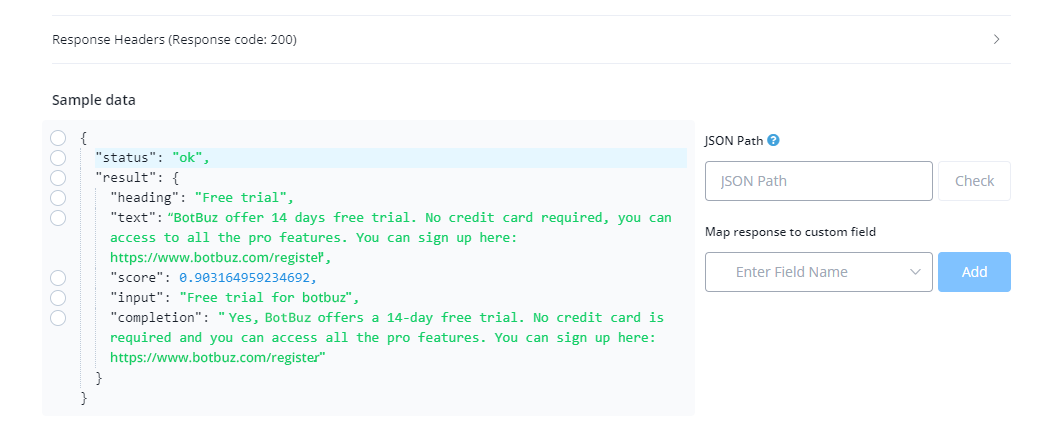
Sample Response Data
Embedding : The heading of the embedding the prompt is best matched to.
Text : The text of the embedding the prompt is best matched to.
Input : The prompt that you input for embedding search.
Score : This is the % of the match between prompt and the embeddings available. You can use this score determine whether the following prompt should be used for completion or is not sufficient and will give inaccurate answers. It is observed that a score of 0.79 and above gives the best possible embedding match. However this is an empirical value and you used split test for your use case in order to obtain best possible answers.
Completion : This is the output or the completion of the prompt the user input.
Using openAI embedding to reply your Facebook & Instagram comments
If you are running ads or have viral post on your Facebook page or Instagram. You may not have the time to attend those comments.
You don’t want to always reply some generic replies, and also you want to the reply is highly relevant to your business questions.
That’s why you need to use openAI embedding to provide highly relevant replies automated.
OpenAI Intent Detection
Botbuz with its native integration with Open AI has now released an intent detection system, which enables the users to collect parameters based on the intent of the query provided. The system works like Google’s Dialogflow where you make intents and fill out entities.
The feature only works when you have your Open AI integrated, hence we will establish a connection betwee OpenAI and botbuz.
Connecting OpenAI Account:
Follow the steps to integrate your OpenAI account with your botbuz account.
Visit https://platform.openai.com
1.Login using your credentials.

2.Click on top-right corner on the “Personal” tab.

3.From here, you will be able to generate an api key.

[Note : You will only be able to see your api key once]
4.Paste your api key inside botbuz and click “Save” to establish the connection.
Your account has successfully been connected with botbuz.
Using Intents
You can use intents by going inside the Automations tab from inside your bot.
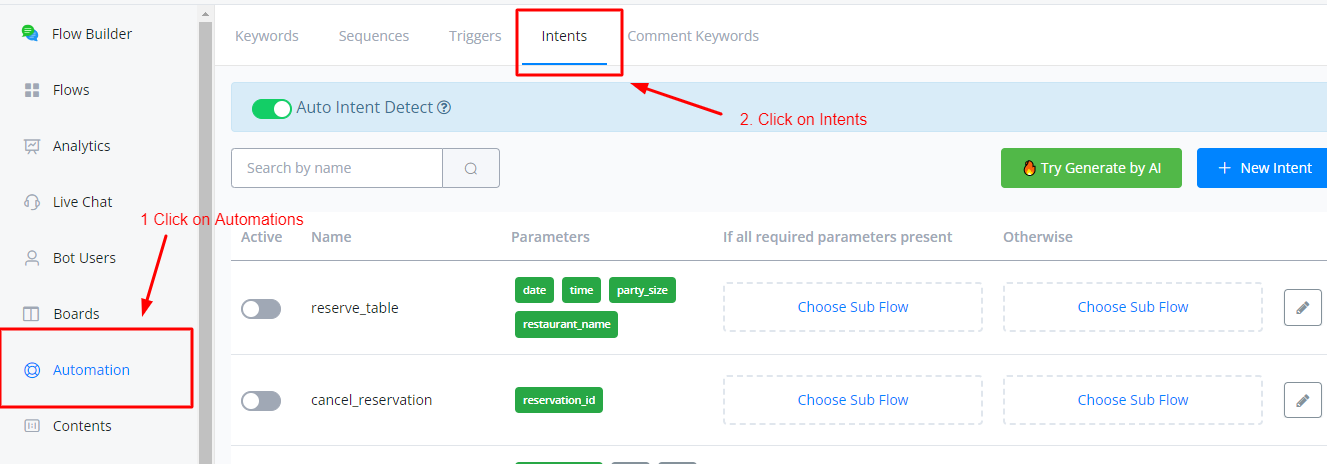
Creating Intents
Enable the “Auto Intent Detect” slider. If you receive an error here, please make sure that your OpenAI account is properly integrated.
Afterwards click on “+ New Intent”

Inside the creation window, you will see the following settings

Click on +Add Parameter to create one
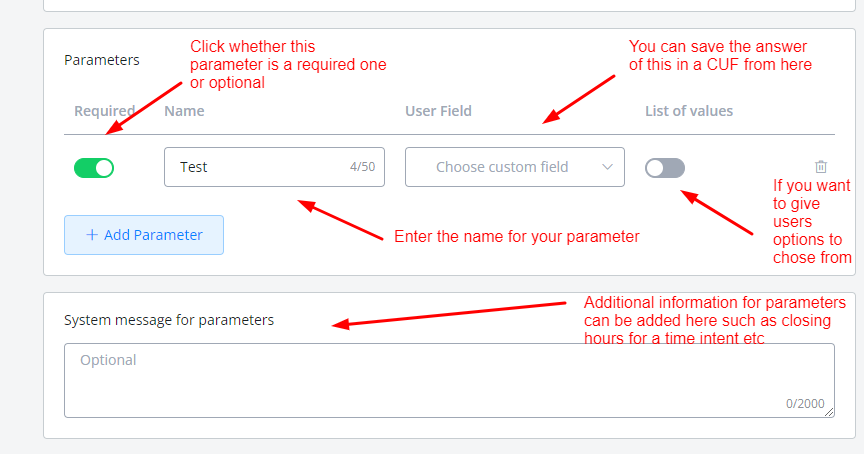
For List of values tab, we give the users some options to choose from. This is used when you want to set a limitation to the data you received from the intent.s reply.
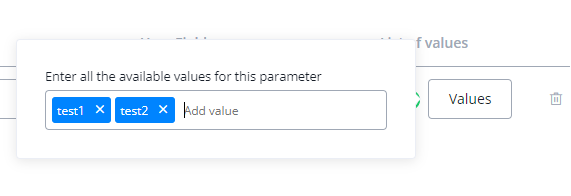
You can add values by clicking on the “Values” tab and entering the probable values for the intent.
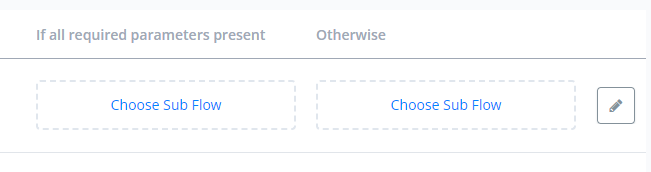
At the last, you will have to choose a subflow to trigger based on the status of your intent.
Clearing User Fields After Intent Is Complete
After an intent cycle is completed, Botbuz saves the intent parameter values inside the custom userfields. Hence if the user next time interacts with the bot again, old values are fetched.
Hence it is important that you clear out the userfields after the intent cycle is complete. The way the intent system works is that it searches for the value of parameters whether they are empty or not and if an old value is stored, it will mark it automatically complete.
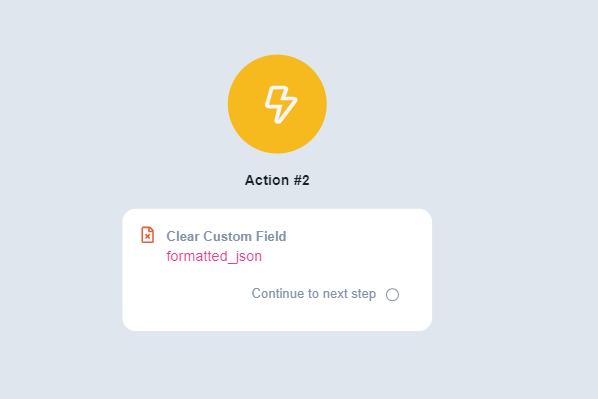
You can build this automation within the flow by saving the intents directly in JSON CUF instead of individual custom user fields and then placing an action node at the very of your attached subflow to clear the values.
Intents Working Inside the Bot
Intents are triggered just like you would trigger a keyword automation or a comments automation. A user will type a question or a statement and then following the hierarchy of automations, the Intent feature will check the intent of the sentence based on the keywords used in the sentence and the confidence score that you provide it to work with.
Once an intent is successfully matched, it will trigger the parameter values collection until all the parameters are filled before triggering the final attached flow.

The following statement should trigger an appointment setting intent if you have configured it that way. And thats how the intent system works on the live bot.
Token Utilization
For intent detection feature, the tokens are utilized based on the number of parameters the intent has to fulfill and the confidence score. That means the higher the number of parameters, the higher the token consumed, similarly the higher the confidence score, the higher the token consumed when detecting intent.